
Optics Explained: How Beam Angles, Lenses, and Baffles Shape Light
Introduction: Engineering Light
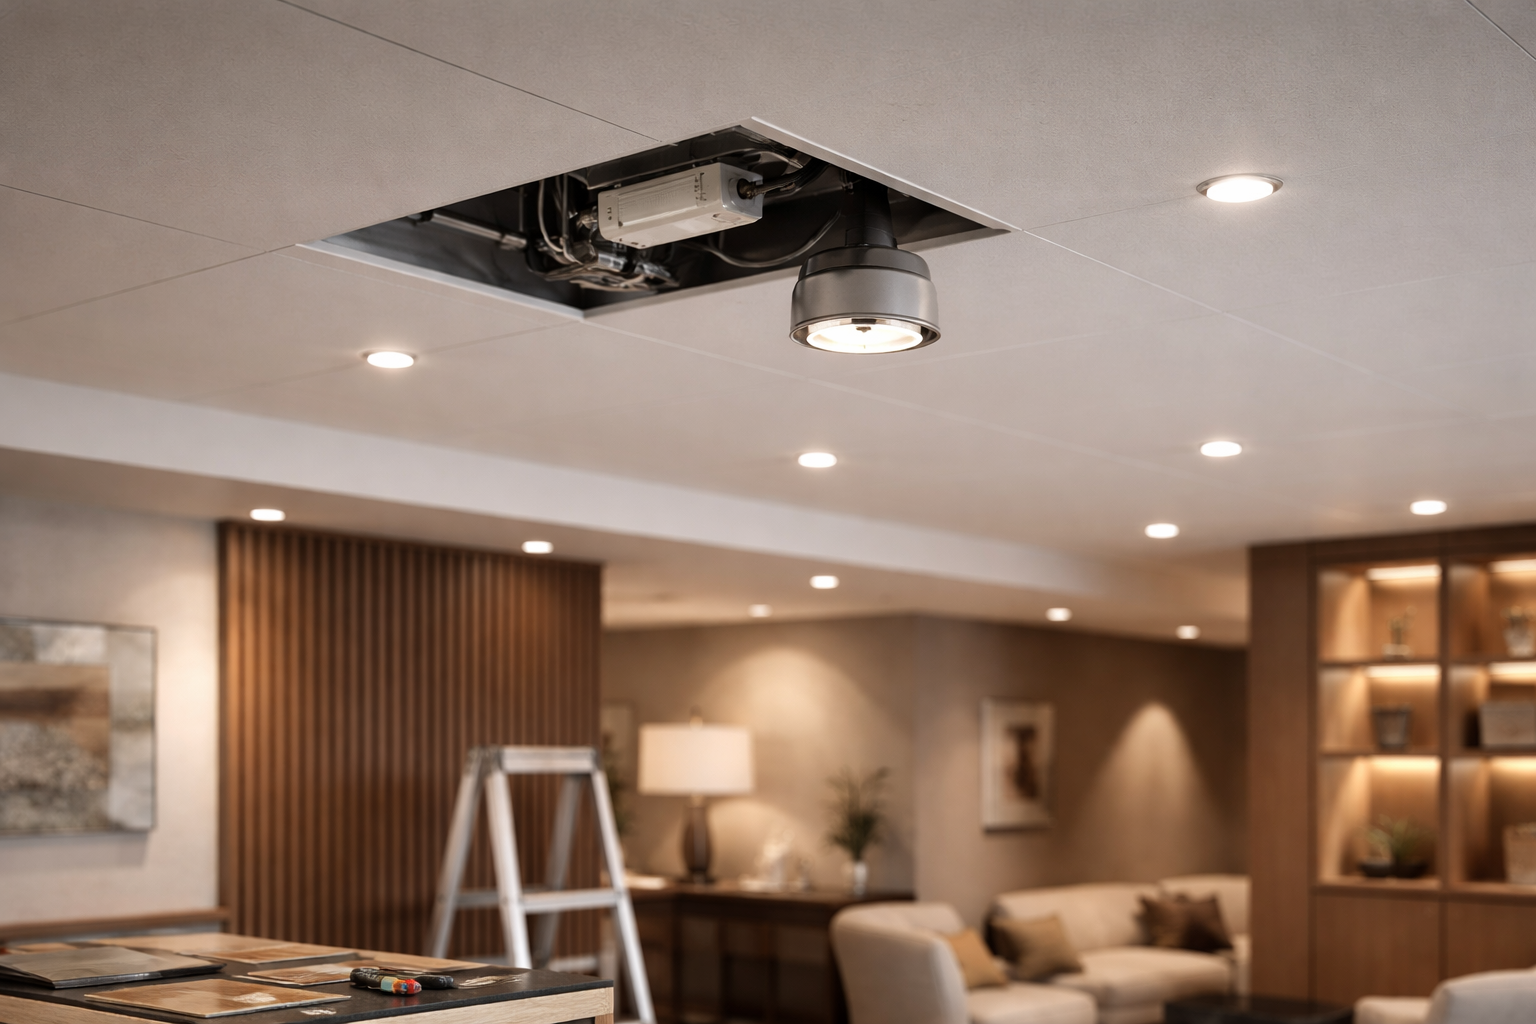
Behind the simple act of a spotlight shining on an object lies a world of optical engineering. A raw LED emits light broadly and harshly. The fixture’s internal optics—the lenses, reflectors, and baffles—are what tame, shape, and direct this light into a useful tool. Understanding these components is key to specifying the right fixture for the job.
Module 1: The Beam Shapers – Lenses and Reflectors
These primary optics collect and pattern the light directly from the LED.
TIR (Total Internal Reflection) Lenses: These are precision-molded plastic or glass lenses placed directly over the LED. They are highly efficient at collecting light and producing a beam with a very defined edge (“hard” edge) and minimal spill. Ideal for accent lighting where precise cutoff is needed.
Reflectors: Specular (mirrored) or matte aluminum surfaces placed around the LED. They tend to create a beam with a softer, more diffused edge (“soft” edge) and wider spill light. Often used for wall washing or general ambient applications.
Module 2: Defining the Spread – Beam Angles
The beam angle determines the cone of light hitting a surface.
Spot Beam (10°-25°): Creates a tight, intense pool of light. Perfect for highlighting a single object from a distance.
Medium/Flood Beam (30°-45°): Provides broader, gentler illumination for a group of objects or a medium-sized area.
Wide Flood Beam (50°-60°+): Used for general ambient lighting or washing large walls evenly.
Module 3: The Glare Fighters – Baffles, Louvers, and Snoots
Secondary optics manage the viewer’s experience by controlling stray light.
Baffles: Grooved, often black, interior surfaces inside the trim. They absorb stray lateral light, increasing contrast and reducing brightness around the fixture opening. A deeply regressed baffle is a primary defense against direct glare.
Honeycomb Louvers: A grid of small, deep cells (like a bee’s honeycomb) placed over the lens. They are the most effective tool for glare control, allowing only light emitted at near-vertical angles to pass through, blocking all off-axis views of the bright LED source. Essential for galleries and low-ceiling applications.
Snoots & Barn Doors: Physical attachments that extend beyond the lens to further constrain the beam’s shape and spill, creating a very theatrical, focused pool of light.
Module 4: Specialized Trims for Specific Tasks
Wall Wash Trim: Features an asymmetric reflector or lens that “kicks” light downward onto a vertical surface, ensuring even illumination from top to bottom without a “scallop” hotspot at the top.
Adjustable Gimbal Trim: Houses the entire LED module in a socket that allows for tilt (and sometimes swivel), enabling precise aiming after installation.
Conclusion: Selecting the Right Optical Tool
Choosing a spotlight is not just about watts and lumens; it’s about selecting the correct optical accessory for your visual task. By understanding the language of lenses, beams, and baffles, you move from simply installing a light to precisely sculpting with light, achieving professional, intentional results in any space.
 FM Lighting Replacements Without Guessing: Check Driver and Dimming Compatibility Before the Fixture Looks “Ready to Replace”
 Hotel & Serviced Apartment Refresh: Check Circuits & Dimming Before Choosing Fixtures
 Why multi-stakeholder projects rush timelines but delay decisions
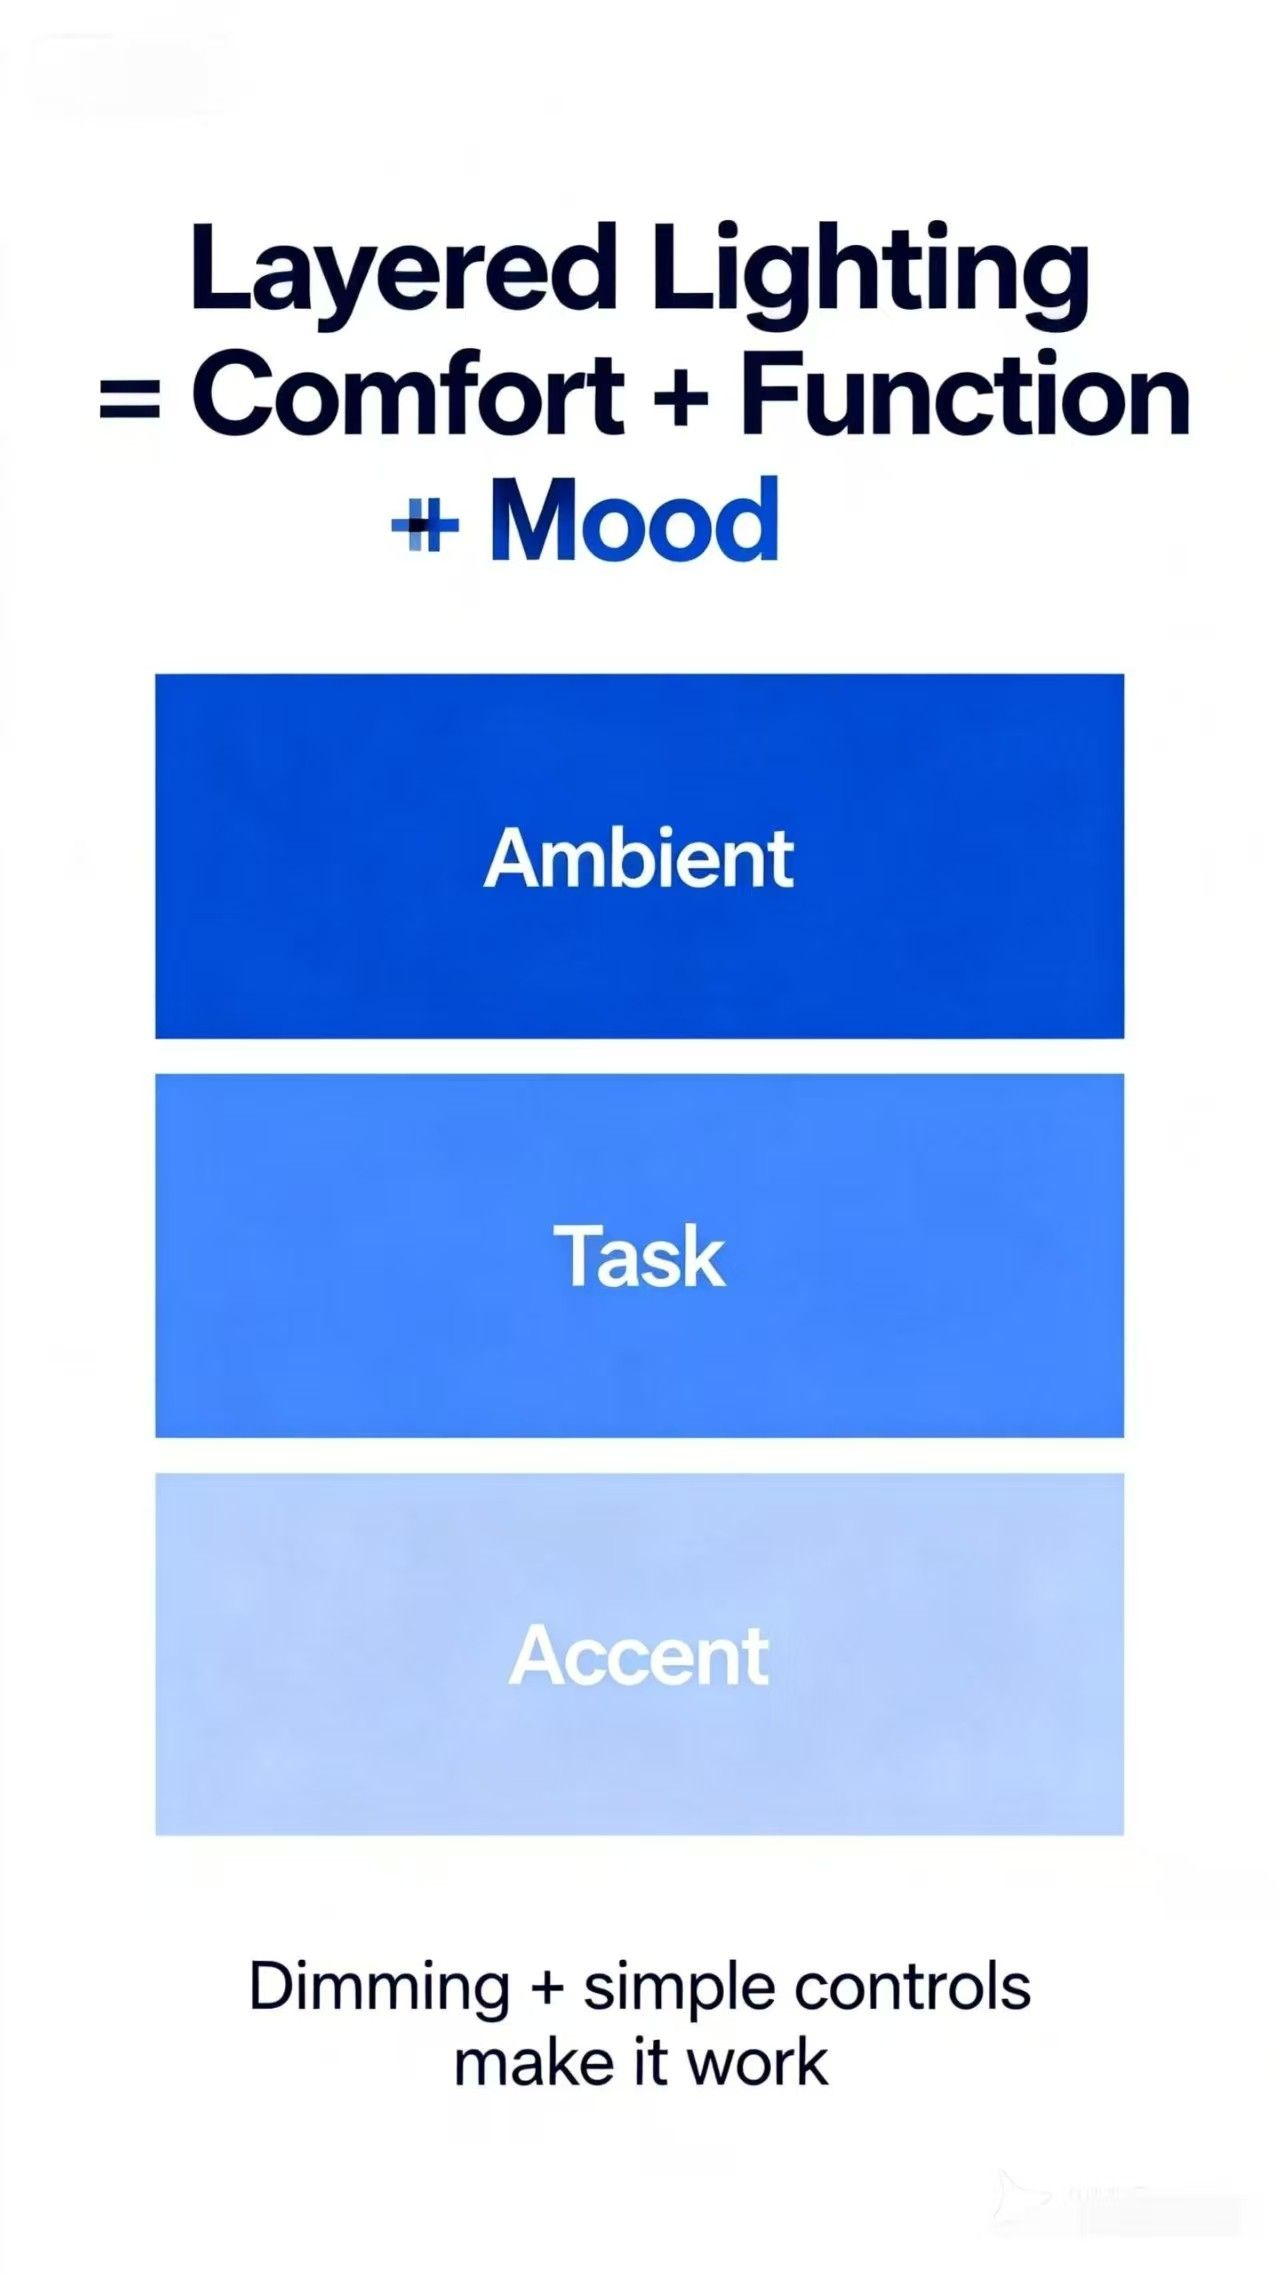 Layered Lighting 101: The Fastest Upgrade That Changes a Home