
5 Common Recessed Lighting Mistakes and How to Avoid Them
Introduction: Beyond the Bulb
Recessed downlights (or “can lights”) are popular for their clean, minimalist look. However, a successful installation depends more on planning than the fixture itself. Get it wrong, and you’re left with glare, uneven pools of light, or a ceiling that resembles Swiss cheese. Here are the five most common mistakes and how to avoid them for a flawless, professional-grade finish.
Mistake 1: The “Swiss Cheese” Ceiling (Improper Spacing)
The biggest error is installing too many lights, too close together.
The Problem: Overlighting creates a cluttered ceiling and washes out a room’s texture and depth. It’s also wasteful.
The Fix: Use the “Rule of Thumb” spacing formula. For general ambient lighting, take the ceiling height and divide by 2. This is the ideal distance (in feet) between each light. For an 8-foot ceiling, space lights about 4 feet apart.
Mistake 2: Ignoring the Beam Angle
Not all downlights create the same light pattern.
The Problem: Using a wide flood (e.g., 60°) for accenting art creates spill and lack of focus. Using a narrow spot (e.g., 15°) for general lighting creates harsh, distinct pools.
The Fix: Match the beam to the task.
Ambient/General Light: Wide flood beam (40°-60°).
Accent/Task Light: Narrow spot or medium flood beam (15°-30°). High-precision adjustable spotlights are ideal here.
Mistake 3: Glaring Errors (Poor Placement & Baffles)
Seeing the bright LED source directly is uncomfortable.
The Problem: Placing downlights where the bulb is in the direct sightline (e.g., at the top of stairs or facing seating). Using shallow “regress” trims that don’t hide the source.
The Fix: Plan sightlines carefully. Always choose deep regressed or baffled trims that recess the LED module and minimize direct glare. For critical areas, specify fixtures with advanced anti-glare deep honeycomb louvers.
Mistake 4: Forgetting Layered Lighting
Downlights alone rarely make a room feel complete.
The Problem: Relying solely on overhead downlights can create a flat, shadowy environment unsuitable for tasks or ambiance.
The Fix: Layer your lighting. Use downlights for general illumination, then add pendants over islands, sconces on walls, and floor lamps for task and accent lighting. This creates dimension and comfort.
Mistake 5: Choosing the Wrong Color Temperature
The white light’s color (Kelvin) sets the entire mood.
The Problem: Mixing mismatched whites (e.g., a warm 2700K light next to a cool 5000K light) in the same space looks chaotic and unprofessional.
The Fix: Stick to one consistent color temperature per room or open-plan zone.
Warm & Cozy (2700K-3000K): Living rooms, bedrooms, dining rooms.
Neutral & Clean (3500K-4000K): Kitchens, bathrooms, home offices.
Ensure all downlights in a series are from the same batch to avoid subtle color variations.
Conclusion: Plan for Perfection
Great recessed lighting is invisible; you notice the beautiful light, not the fixture. By avoiding these common errors—planning your layout, selecting the right beam, controlling glare, layering light, and keeping color consistent—you transform a basic functional element into a cornerstone of exceptional interior design.
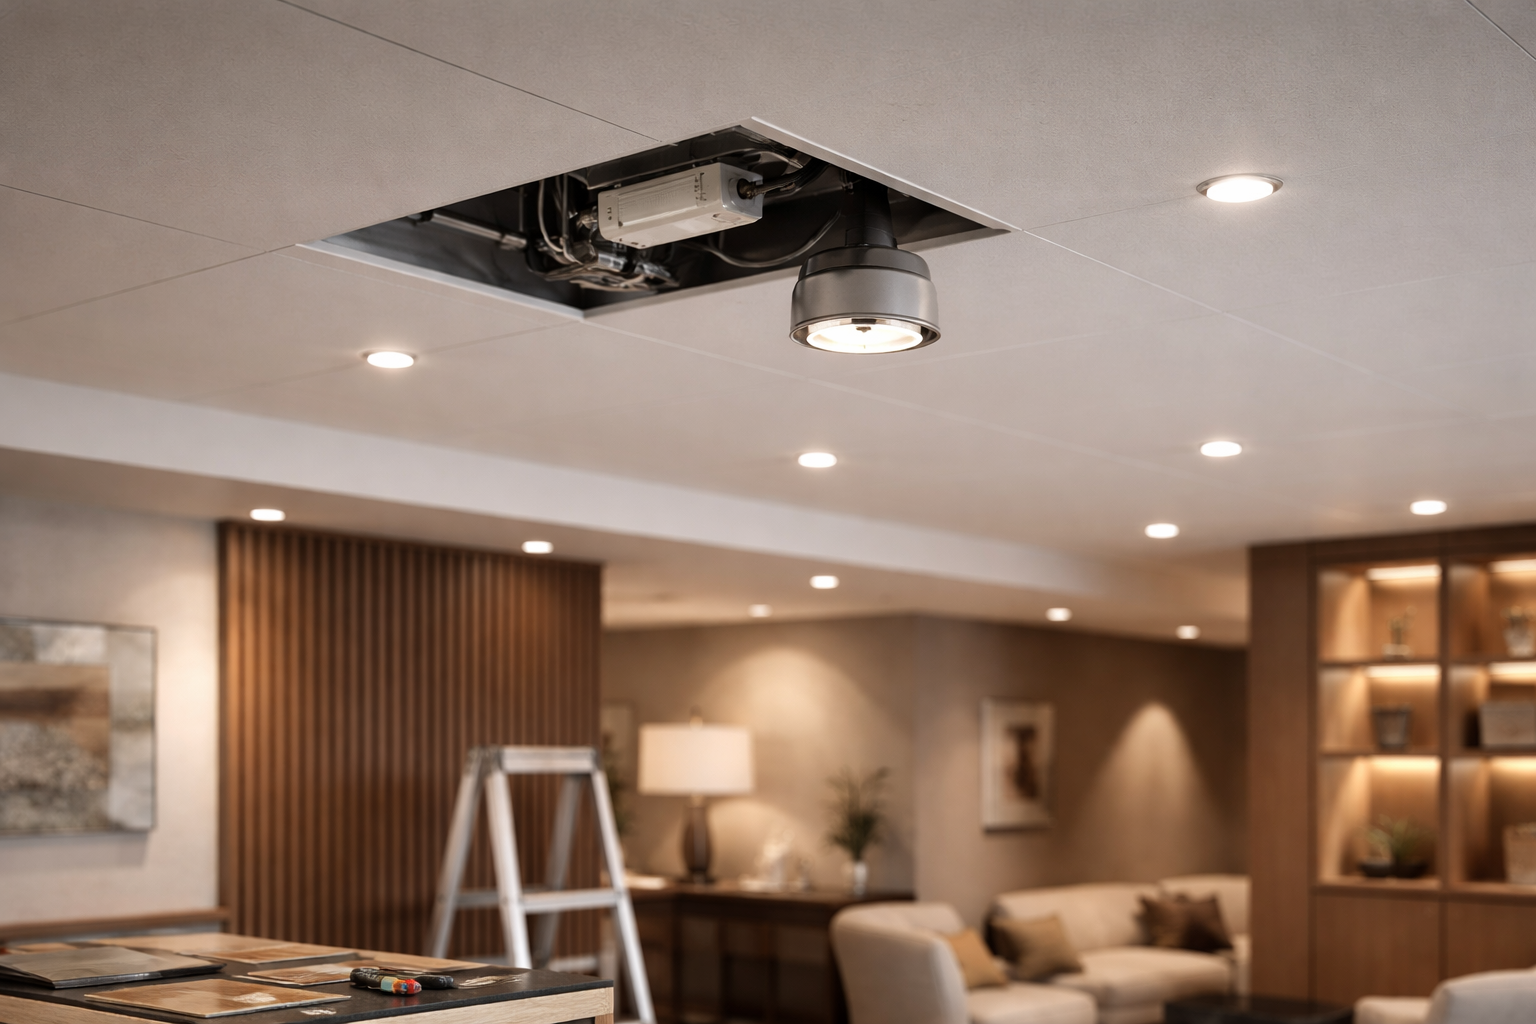 FM Lighting Replacements Without Guessing: Check Driver and Dimming Compatibility Before the Fixture Looks “Ready to Replace”
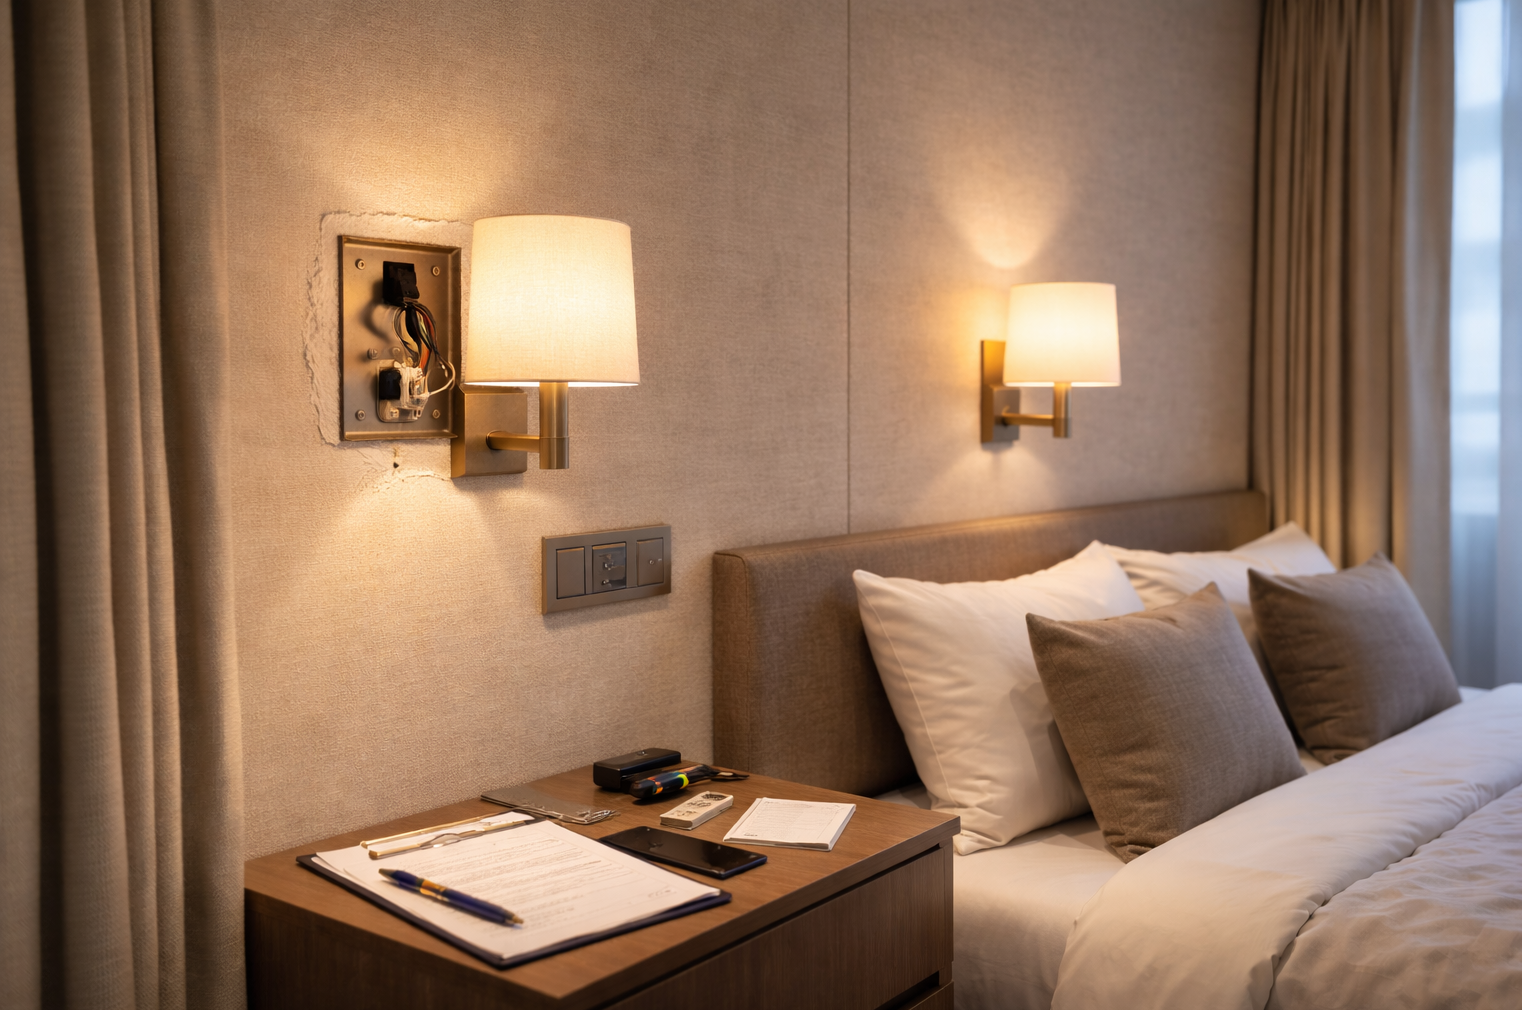 Hotel & Serviced Apartment Refresh: Check Circuits & Dimming Before Choosing Fixtures
 Why multi-stakeholder projects rush timelines but delay decisions
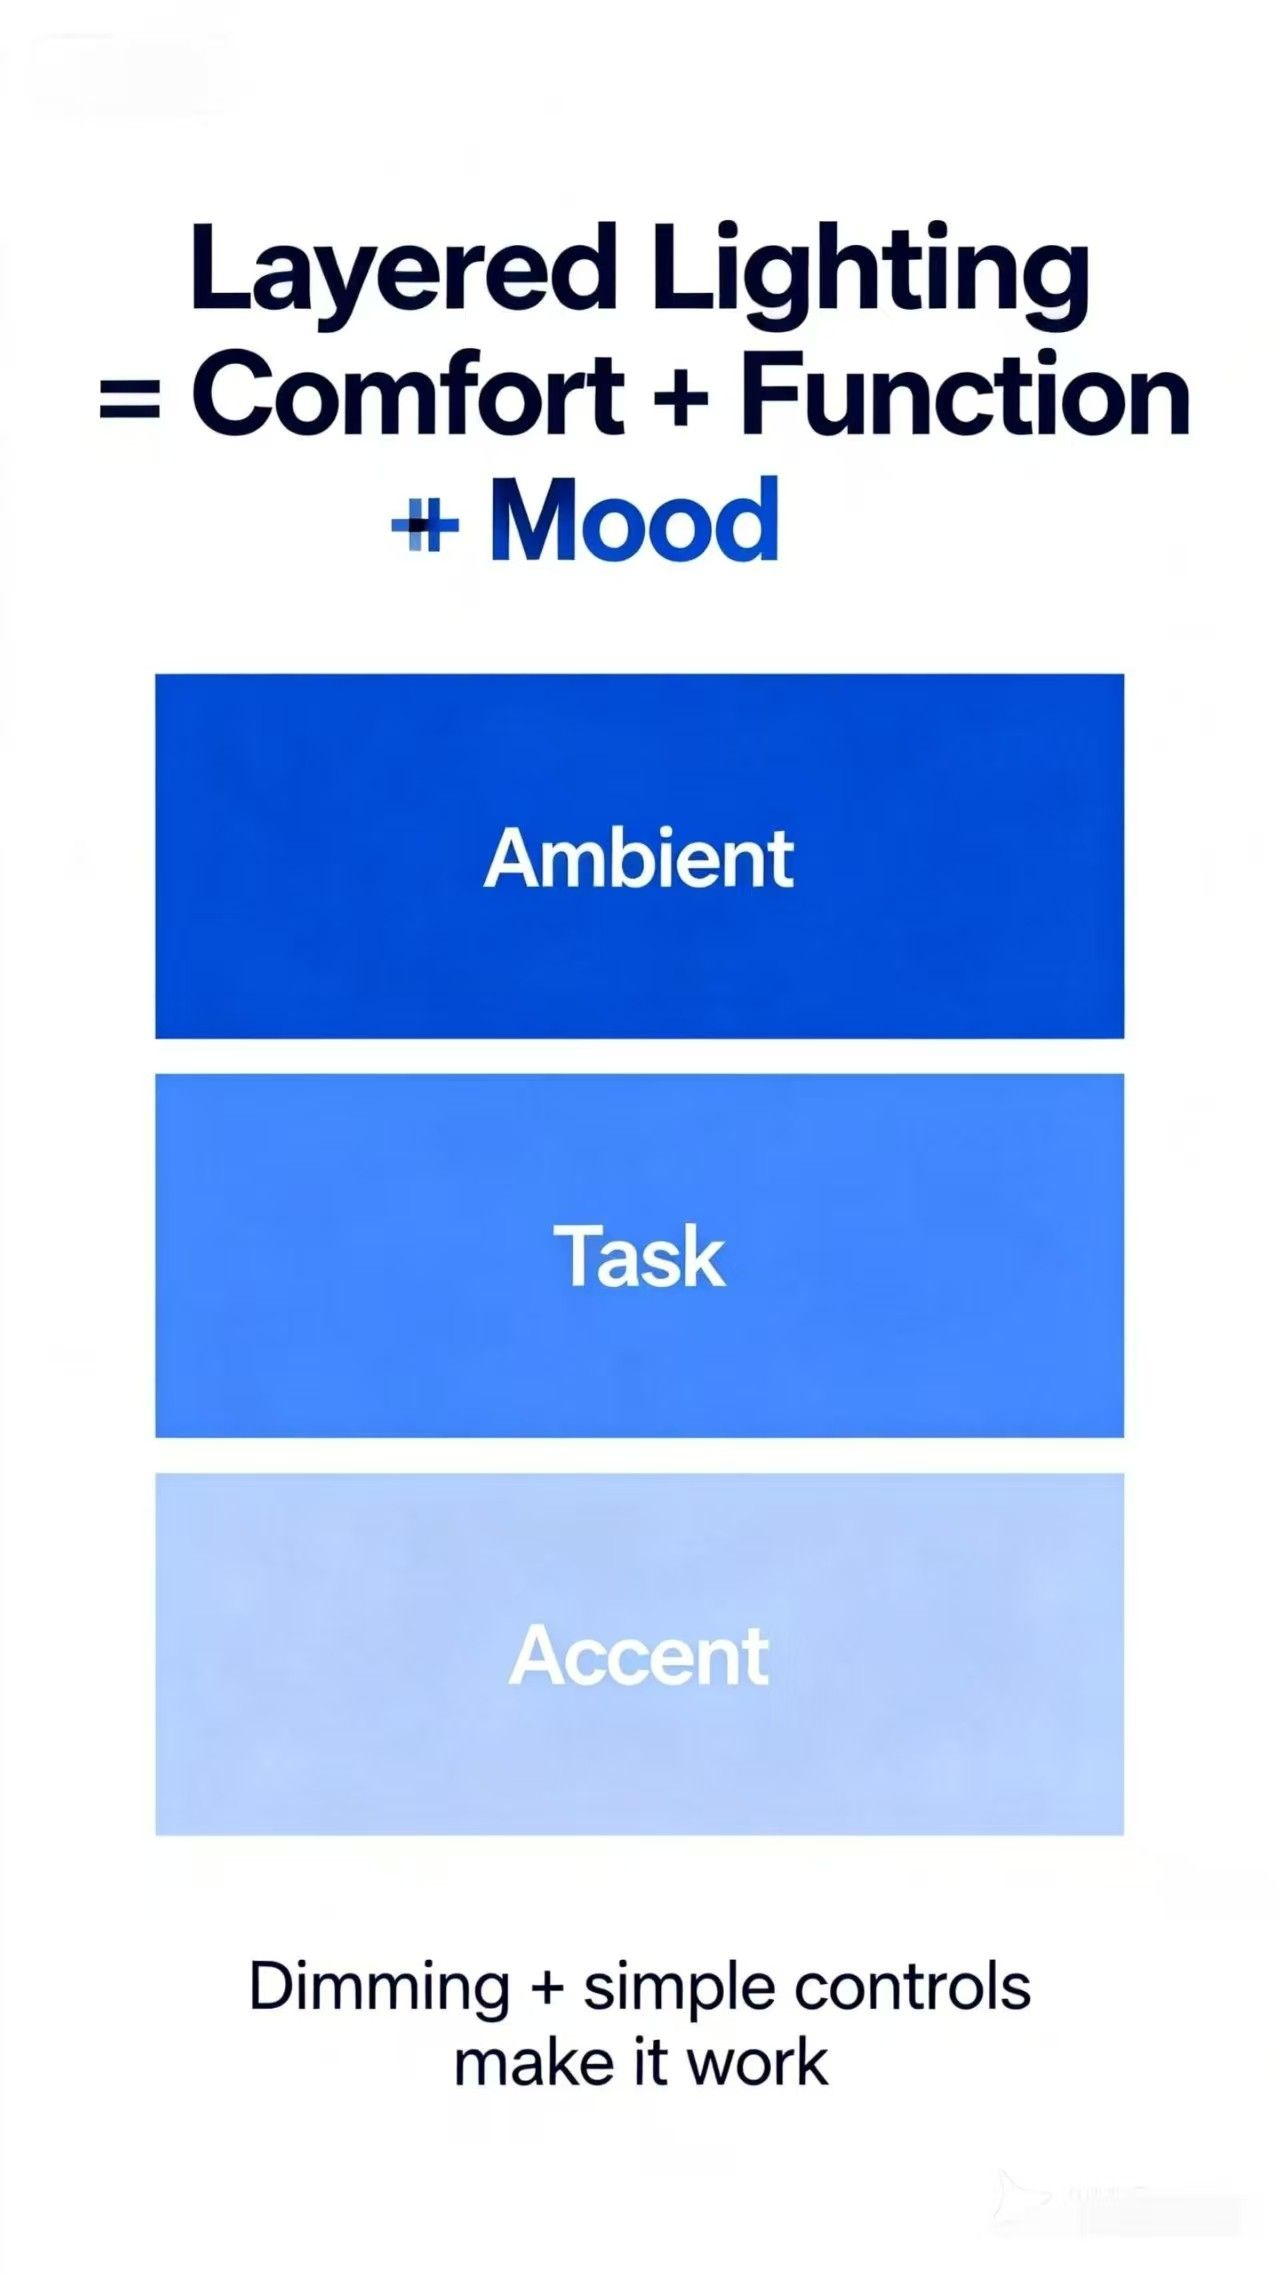 Layered Lighting 101: The Fastest Upgrade That Changes a Home